
.png)


How to assemble our Shipping Containers
- kyamsildesigns

- Jul 3, 2019
- 3 min read
Updated: Jan 9, 2020
Hello everyone. This is our first blog entry in what we hope will be a useful tutorials series about how to work with our products.
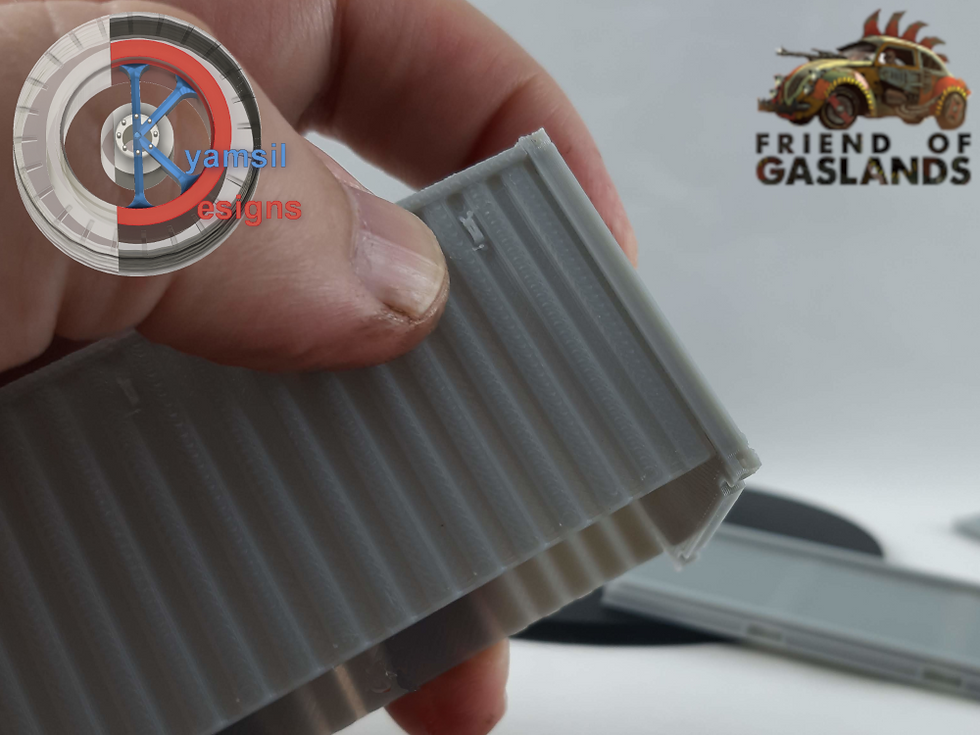
These are the step by step instructions on how to assemble the shipping containers. We have tested the prints and they can be held together without glue so you can bend them back to a flat shape for storage after you are done using them. However, bending the pieces back and forth will eventually make the material to wear and break so we recommend gluing them together and that is what we are going to assume on the instructions. Ignore any reference to applying glue in the step by step guide if you want to keep it flexible.

This first step is completely optional. As part of the printing process the models will have some layer lines, and in some cases a pattern on flat surfaces made by the constant movement of the nozzle while depositing the melted plastic. In the case of the shipping containers this is more apparent in the raised parts of the corrugated steel side panels. Using some fine grit sandpaper you can sand them down to make them smoother. Once primed and painted it should hide those patterns (unless you use dry brushing on top of them as that will make it pop up) Still, for tabletop quality this is not a must.

Following the grooves highlighted in red in the picture, carefully bend the top and side panels so they form a right angle. It might need to bend past the 90 degree angle for a bit so when it flexes back after releasing pressure it stays at a right angle. Don't apply excessive force and don't panic if a tiny crack forms. During our test prints it happened on one occasion and the crack isn't noticeable after assembly and painting.

Repeat the process on the other side panel until you end up with a U shaped piece. We are done with bending.

Next, notice that the U shaped part that forms the ceiling and sides of the container has some tabs on each side (don't worry, there is no real front and back as they are symmetrical. Check that the back panel has some grooves for the tabs to go into. Some minor cleaning of the grooves may be needed using a hobby knife. Align the piece so the 3 tabs on the ceiling/side panels match the grooves on the back panel. Add some glue into the recesses and insert the tabs making sure the three go into their position with no obstructions. Press until all the sides of the back panel are parallel with the edges. It should look like the following picture.
Now, repeat the process for the door panel as shown on the following picture.

The process is exactly the same as for Step 4 above: align tabs and grooves, check grooves for obstructions, apply some glue and insert all three tabs into their corresponding groove. Then press the door until its side panels are parallel to the sides of the central piece as shown below.

We are almost done.

Now, examine the floor piece. There is an inside face, the one with the bars running along the long sides. Those are there so you can add some glue to them where the small red arrows are pointing so you can seal the side panels against them when attaching the floor to the rest of the container. They also help with keeping it in place when not gluing it. Make sure to add glue to the bars on the outside edge on both sides and align the floor with the leftover space between the door and back panels. it should fit snugly into place. And with that, assembly is done.

That's it, add some painting, maybe some rust effects and enjoy your new scenery piece for your games of Gaslands.


Comments